
 When you're browsing a website and you need more information on something, what's the first thing you look for? Very often, you have to dig around in navbars and footers for a phone number or an email address. In some cases, it feels like you need to be Sherlock Holmes to find it and it becomes very frustrating! In fact, if I struggle to find it within a minute or 2, I'll just leave. For me, the first thing I look for is an Online Chat. If they don't have that, I will look for an email address or an online contact form and failing that, a phone number. I'm not a fan of talking on the phone, especially if I have a simple question about something and I'm not alone. For people aged 54 and below, the majority of people would prefer to use text over voice as a form of communication on a mobile device so it's no wonder that messaging apps such as WhatsApp and Facebook Messenger have become so popular. 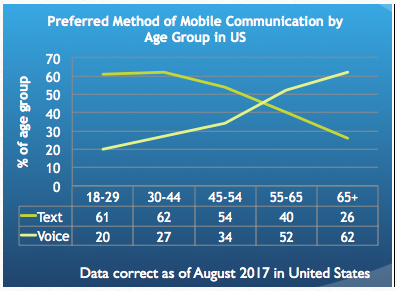 According to Facebook, 53% of people are more like to shop with a business that they can message directly. That's where an online chat widget becomes a golden nugget on your website. The good news is, there's an excellent solution and it's completely free. Facebook have made it possible for you to add their Messenger widget to your website and it's completely free. The other great thing about the Facebook Messenger widget is it allows you to continue the conversation on another device. So it might start on a desktop but then you have an appointment to get to but with Messenger, you can continue the conversation on your mobile device. It's fast, flexible and people like using it. It's relatively simple to set up and we're going to run you through it. You don't have to be super technical to do it yourself but if you're worried about adding the code snippet to your website or have absolutely no idea about how to do that, you may want to enlist the help of your web developer. They'll be able to do it in a matter of minutes. Step by Step Guide to Adding the Facebook Messenger Widget to Your WebsiteHere's what you'll need:
We will now look at each step in detail. We'll assume that you already have a Facebook page set up so I won't be covering how to do that in this post. Instead, I'll be starting with how to find your Facebook Page ID. Setup your Customer Chat PluginFrom your Facebook page, click Settings (top right of screen beside Help). Then click on Messaging on the left hand menu. 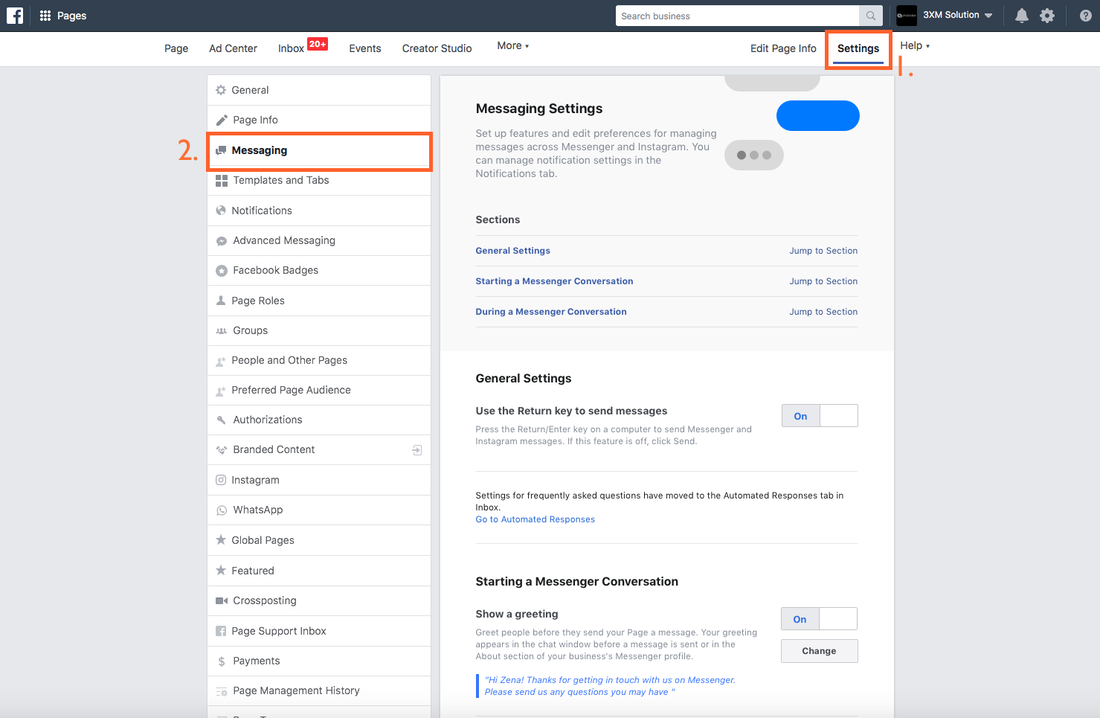 Then scroll down and click the Get Started button where it says Add Messenger to Your Website. That will take you through the set up step by step. 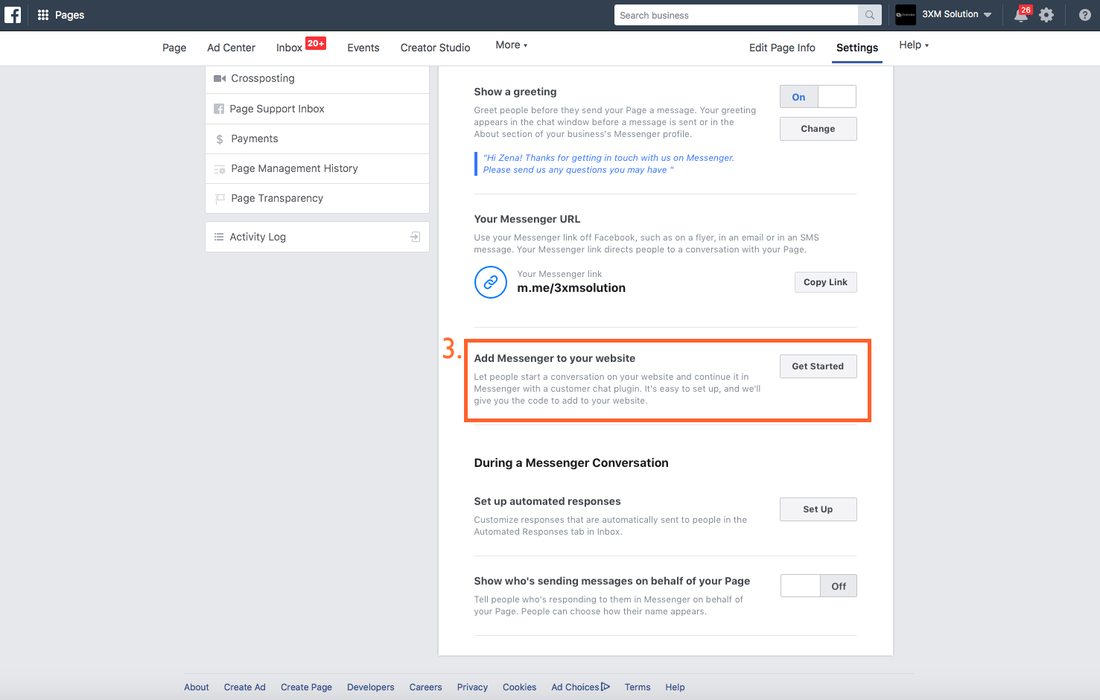 1. Create your greeting message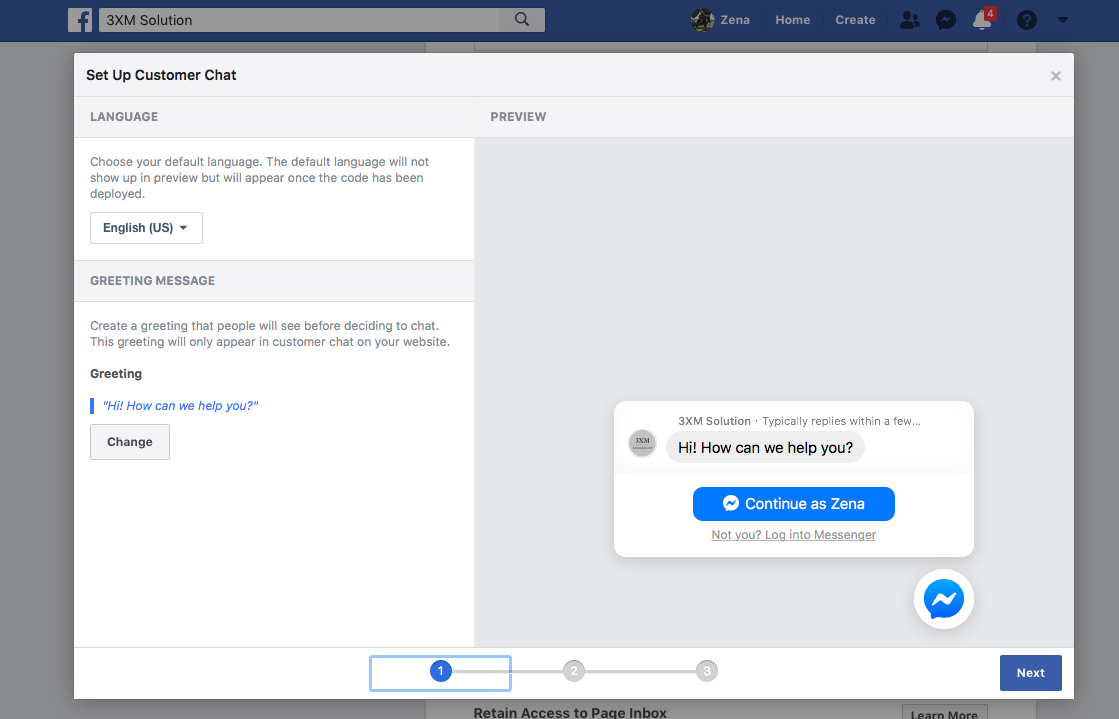 2. Choose your coloursYou can choose to change the colour scheme to match your brand/website or leave them with Facebook's default blue colour. 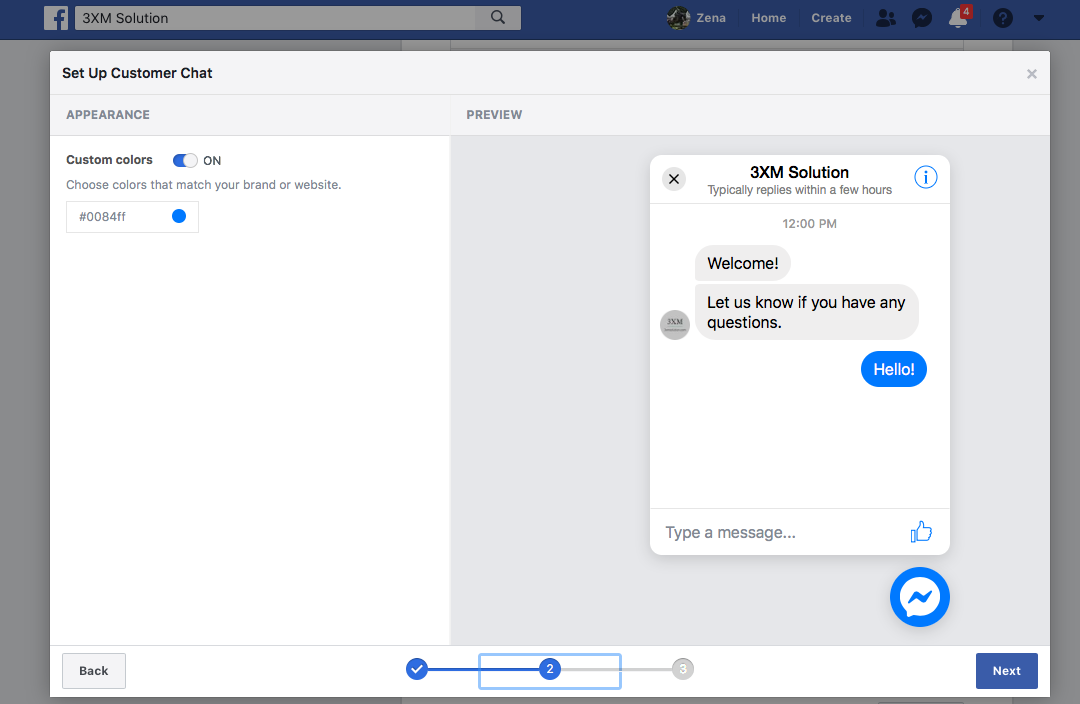 3. Whitelist your domainsYou will need to type in all variants of your domain into the box. Make sure you include the http:// and https:// versions so it works for all users. Then hit Save. 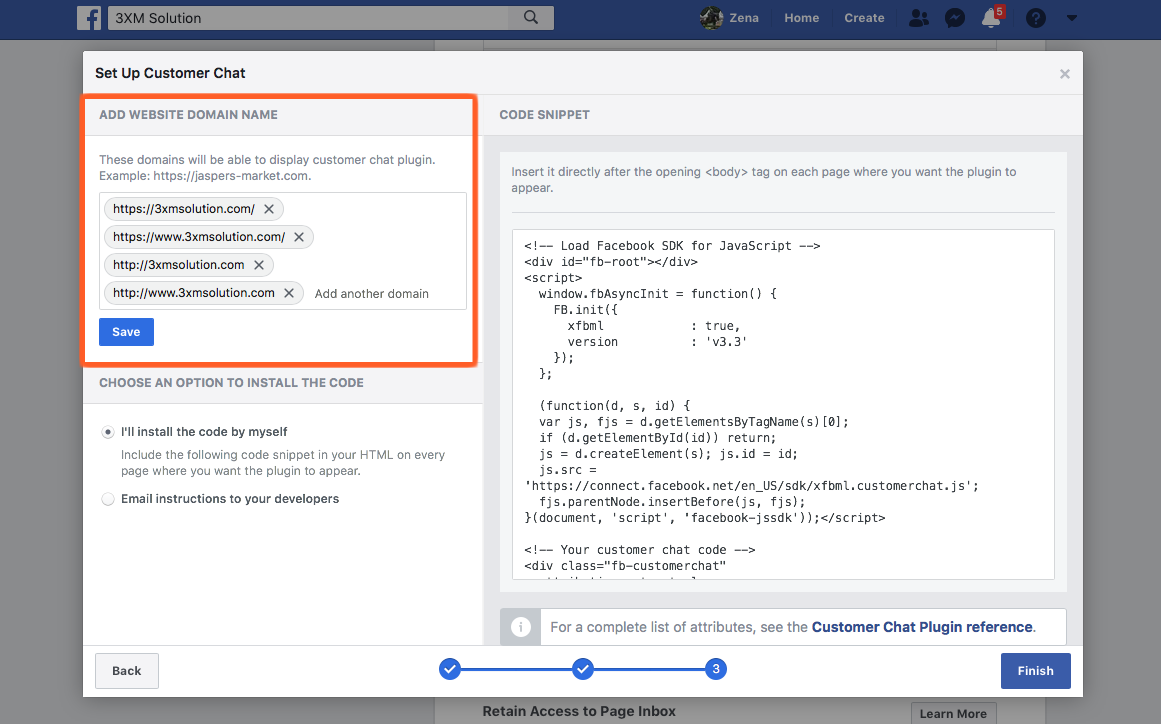 4. Embed the code snippet into your websiteThe last step is to copy and embed the code snippet into your website. If you feel confident in doing it yourself, copy the snippet and paste it just before the </body> tag on your webpage code. If you want it to appear on all pages, ensure you include it on all pages. 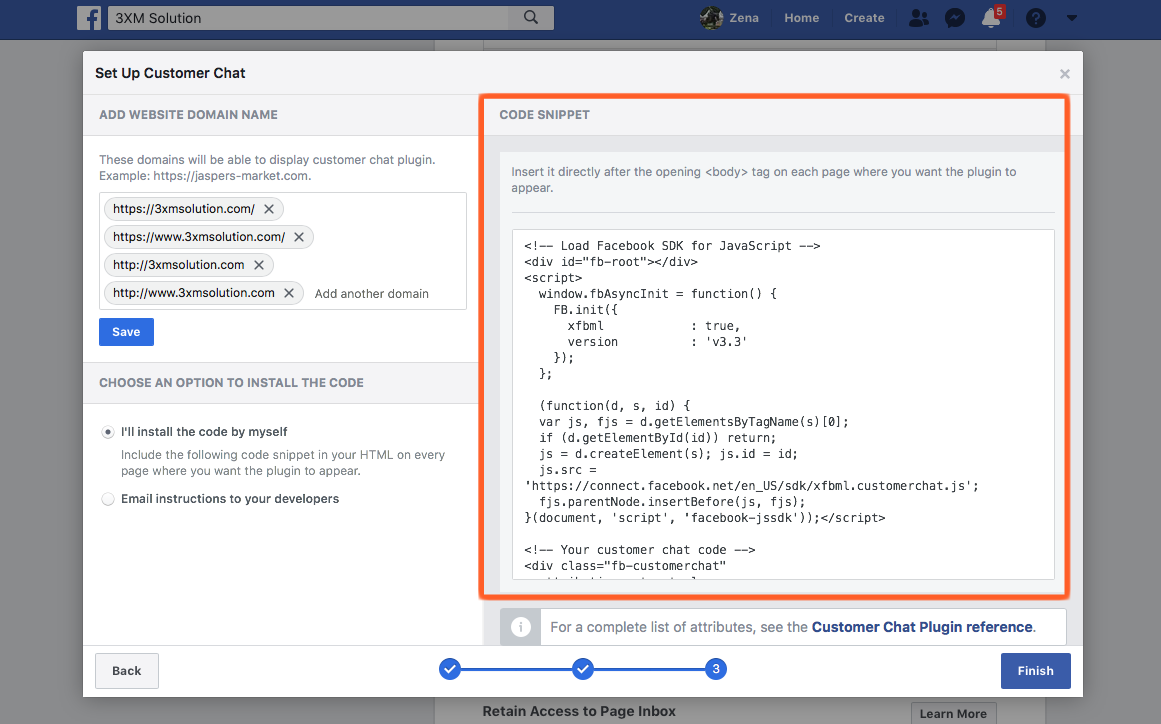 If you're not comfortable doing it yourself or have no clue how, then select the option to email it to your web developer. 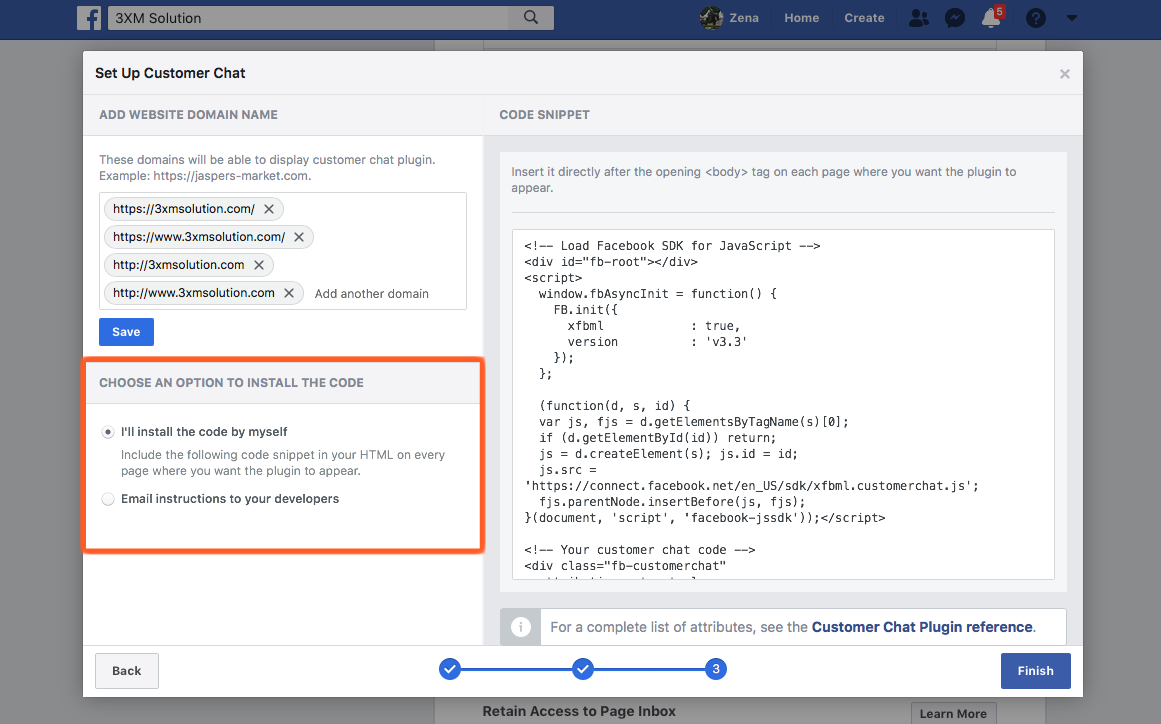 When you're done, click the Finish button.
Go to your website and test it out to make sure all is working ok. If you have any issues, here's a link to Facebook's full documentation If you found this article useful, you might like to join our 3XM Insiders Facebook group which is packed with useful and actionable sales and marketing tips for your photography business.
5 Comments
Zena
19/7/2019 08:39:45
Glad to hear it David :) 18/7/2019 16:07:58
sadly, I can not get my zenfolio site to work with this method. I embed it in as instructed and all that appears is a embedded content box that will not allow anyone to click. :(
Zena
19/7/2019 08:39:07
Hi Tiffany, Leave a Reply. |

AuthorsRonan Ryle Archives
August 2023
Categories
All
|
 RSS Feed